
wsl的安装和配置
安装ubuntu子系统
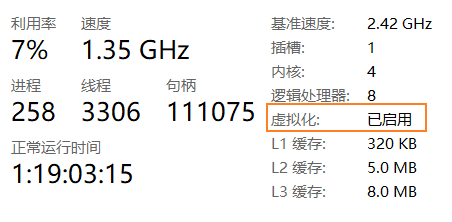
- 需要说明的是,安装windows子系统,需要开启
Hyper-V,启动方式参考网上教程。 - 检查是否开启,打开任务管理器,选择任务一栏。

- 但是,开启
Hyper-V可能导致一些旧版本VMware等虚拟机无法使用,但是最新的虚拟机已经支持Hyper-V。
开启虚拟化:
- 开机按
F12或者DEL进入Bios(不同主板可能不一样)。- 点击
Advanced Mode(F7)进入高级选项。- 点击
Advanced,找到并点击CPU Configuration。- 下拉菜单找到
Intel Virtualization Technology,在其子菜单下把选项改成Enabled。- 按
F10保存并推出,CPU虚拟化开启成功。
启用WSL
- 启用WSL,可以通过管理员运行powershell,运行命令
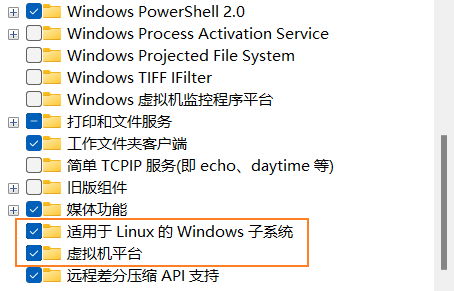
dism.exe /online /enable-feature /featurename:Microsoft-Windows-Subsystem-Linux /all /norestart。但是不建议采用这种方式。后面似乎无法安装GUI。 - 打开控制面板,选择程序后,选择启动或者关闭windows功能。
- 勾选适用于Linux的windows子系统和虚拟机平台,等待完成。之后会提醒重启,按要求重启更新即可。
- 打开windows设置,搜索开发者选项,勾选开发者模式。为之后的
ubuntu安装程序做好配置。


安装WLS和ubuntu。
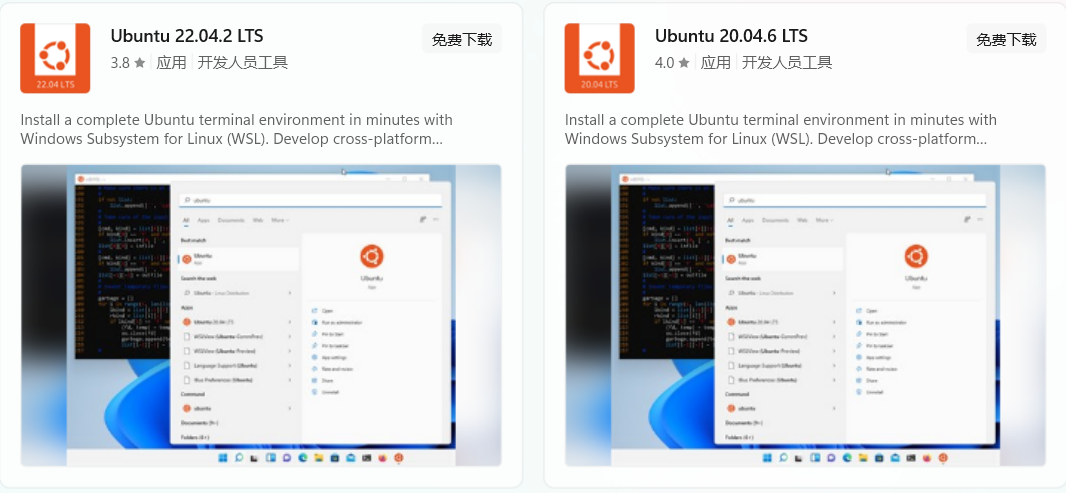
- 当然,你可以直接去微软商店搜索
ubuntu,下载ubuntu的即可。但是我们不采用这种方式。 - windows11已经简化了WLS安装方式,可以简单地用管理员权限打开一个命令提示符窗口,运行
wsl.exe --install。一旦你点击回车键,这个过程将自动启用WSL所需的可选功能,默认安装Ubuntu发行版,并在你的设备上安装最新的WSL Linux内核版本。当它完成后,重新启动你设备,发行版会在你再次启动后启动,完成安装。但是我们也不采用这种方式。 - 我们采取如下方式安装:
- 管理员权限下,使用
cmd运行命令wsl --status查看默认版本,由于后面安装GUI,所以推荐使用WSL2。可以使用wsl --set-default-version 2设置WSL版本。 - 你需要运行
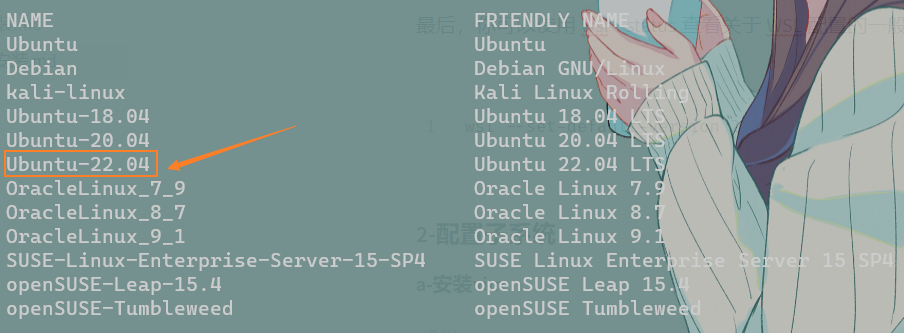
wsl --update更新WSL,此外也你可以使用wsl --update rollback来回滚到之前的WSL内核版本。 wsl --list --online查看可安装的Linux发行版。这里提一下,不带版本号的ubuntu可以更新更高版本,带版本号的不能更新到更高版本。- 运行
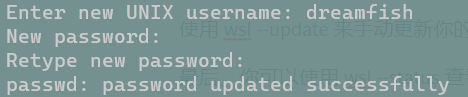
wsl --install <DistroName>安装Linux发行版。例如安装wsl --install Ubuntu-22.04。此后等待一段时间后,会要求设置账户和密码(这里是普通账户)。 - 之后就可以在菜单中发现
ubuntu的踪迹了。 - 其实还默认创建了一个
root用户,可以通过sudo passwd root修改root用户密码。 - 安装完成后,windows系统会存在一条命令即
ubuntu+版本号去掉小数点。例如我的是ubuntu-22.04,那么对应的命令就是ubuntu2204。使用win+R输入该命令回车即可打开子系统。 - 此外如果当前linux子系统是
wsl默认子系统,可以直接使用wsl命令打开。
- 提一嘴,若是需要从本地安装linux发行版,可以运行
wsl --install --no-distribution,也即安装 WSL 时不安装发行版。
WSL常用命令
wsl --list --online:列出可用的 Linux 发行版。wsl --list --verbose:列出已安装的 Linux 发行版。wsl --set-version <distribution name> <versionNumber>:WSL 版本设置。wsl --distribution <Distribution Name> --user <User Name>:通过PowerShell或cmd运行特定的Linux发行版。wsl -d <Distribution Name> -u <User Name>:通过PowerShell或cmd运行特定的Linux发行版。wsl ~:将目录更改为主页。wsl --help:Help 命令。wsl --shutdown:关闭wsl(会关闭所有子系统)。wsl -t <DistributionName>:停止分发,关闭某个子系统。wsl --unregister <DistributionName>:注销或卸载 Linux 发行版。wsl启动默认linx子系统。
ubuntu迁移
-
终止正在运行的WSL,即运行
wsl --shutdown。 -
将需要迁移的Linux,进行导出,运行
wsl --export <DistributionName> D:\xx.tar。其中<DistributionName>是子系统名称,D:/xx.tar路径自定义,但是需要格式为.tar。 -
导出完成之后,就需要将原有的分发进行卸载。
wsl --unregister <DistributionName>。其中<DistributionName>是子系统名称。 -
然后将导出的文件放到需要保存的地方,进行导入即可。即运行命令
wsl --import xxx D:\xx\ D:\xx.tar --version 2。其中--version 2用于设置WSL版本。 -
设置默认登录用户。即运行
Ubuntu2204 config --default-user {你的用户名}。这里提一些安装非固定版本,直接使用ubuntu即可,特定固定版本使用ubuntu+版本号去掉小数点。 -
删除
.tar文件,运行del D:\xx.tar。1
2
3
4
5
6
7
8
9
10
11
12
13wsl --shutdown # 关闭wsl
wsl --export Ubuntu-22.04 D:\ubuntu.tar # 导出
wsl --unregister Ubuntu-22.04 # 卸载原本子系统
wsl --import Ubuntu-22.04 D:\Ubuntu\ D:\ubuntu.tar --version 2 # 导入
Ubuntu2204 config --default-user dreamfish # 设置默认账户
wsl --list --verbose # 查看已安装子系统
del D:\ubuntu.tar # 删除压缩包
安装GUI
-
真实测试,最后带不动,远程连接连不上,电脑闪屏。
-
目前通常使用两种GUI,即
xfce4和Gnone。xfce4虽然确实是小巧方便,但是很丑,影响使用者情绪,弃之。 -
首先运行
sudo apt update & sudo apt upgrade更新源并升级安装包。 -
强调一点,安装Gone先去换个源。
-
之后便是安装
Gnone,步骤如下(需要经历漫长等待:1
2
3
4
5
6
7
8
9
10
11
12更新源
sudo apt update
运行下面,避免出现acpi-support直接卡死(我也不知道为啥)
apt-get install -y acpid
systemctl disable --now acpid.service acpid.socket acpid.path
安装Gnone(二选一)
sudo apt install -y ubuntu-desktop
安装xfce(二选一)
sudo apt install xubuntu-desktop -
安装
Xrdp,Xrdp是一个微软远程桌面协议(RDP)的开源实现,它允许你通过图形界面控制远程系统。步骤如下:1
2
3
4
5
6
7
8
9
10
11sudo apt install -y xrdp
sudo systemctl status xrdp
sudo adduser xrdp ssl-cert
sudo systemctl restart xrdp
查看一下配置文件中的端口(默认:3389)
vim /etc/xrdp/xrdp.ini
配置防火墙
sudo ufw allow 3389 -
但是似乎每次启动都需执行,
sudo systemctl restart xrdp。可以试试开机自启。 -
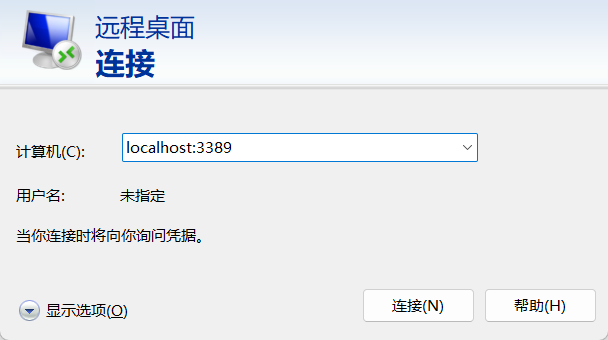
打开Windows自带的远程桌面工具可以远程操作。找不到就
win+s搜索一下。注意端口号是xrdp而不是ssh的。 -
输入账户、密码即可。
新增用户
- 实际上安装子系统是默认创建
root用户并让我们按指引创建普通用户,我们平时使用并不需要折磨大的权限,就使用普通用户即可。此外我们还可以自己创建一个普通用户用于使用。 useradd -m xxx -s /bin/bash创建新用户。passwd xxx创建或者修改用户密码。- cmd或者powershell
ubuntu22.04 config --default-user xxx设置默认用户。
终端信息输出
-
可能有人觉得这除了装X没啥用,但个人觉得要努力把生活变成自己热爱的东西,只是它好看,我喜欢,这就够了。
-
首先我们需要使用
apt install neofetch -y安装neofetch。 -
运行
neofetch -L显示logo,当然你也可以运行neofetch显示logo和系统信息。 -
使用
gedit ~/.config/neofetch/config.conf编辑配置文件,注销#info "Packages" packages,每次扫描包太费时间了!下面是一些其他配置:1
2
3
4
5
6
7
8
9
10
11
12
13#info "Packages" packages
#info "Theme" theme
#info "Icons" icons
info "Disk" disk
memory_percent="on" # 显示内存百分比
info "Local IP" local_ip # 显示ip信息
info "Public IP" public_ip
#image_source="auto"
image_source="ascii文件路径" # 这里填写自己的ASCII图像txt文件的路径 -
好看的ASCII图像(一些查找生成网站:banner生成、文字转),复制保存到自己的txt文件中即可:
1
2
3
4
5
6
7
8
9
10
11
12
13
14
15
16
17
18
19
20
21
22
23
24
25
26
27
28
29
30!
!
^
/ \
/___\
|= =|
| |
| |
| |
| |
| |
| |
| |
| |
| |
/|##!##|\
/ |##!##| \
/ |##!##| \
| / ^ | ^ \ |
| / ( | ) \ |
|/ ( | ) \|
(( ))
(( : ))
(( : ))
(( ))
(( ))
( )
.
.
.1
2
3
4
5
6
7| ̄ ̄ ̄ ̄ ̄ ̄ ̄ ̄ ̄ ̄ ̄ ̄ ̄ ̄|
I am a philosopher.
|______________|
\ (•◡•) /
\ /
---
| | -
关于logo颜色,不太会设置,直接运行
sudo apt install lolcat安装lolcat,然后运行neofetch | lolcat就可以出现渐变色。(termux中使用pkg install ruby && gem install lolcat) -
个人效果图,打算直接使用
neofetch -L | lolcat不显示系统信息:1
2
3
4
5
6
7
8
9
10
11
12
13
14
15
16
17
18
19
20
21
22
23__
/ /\
/ / /\
/ / /\ \
/ / /\ \ \
__________/_/_/__\ \ \__________
/\ \_______________\ \ \_________\
\ \ \_______________\ \ \________/
\ \ \ / / / \ \ \ / / /
\ \ \/ / / \ \ \/ / / ________ _____.__ .__
\ \/ / / \ \/ / / \______ \_______ ____ _____ ______/ ____\__| _____| |__
\/ / / \/ / / | | \_ __ \_/ __ \\__ \ / \ __\| |/ ___/ | \
/ / /\ / / /\ | | \ | \/\ ___/ / __ \| Y Y \ | | |\___ \| Y \
/ / /\ \ / / /\ \ /_______ /__| \___ >____ /__|_| /__| |__/____ >___| /
/ / /\ \ \ / / /\ \ \ \/ \/ \/ \/ \/ \/
/_/_/__\ \ \________/_/_/__\ \ \
/________\ \ \_______________\ \ \
\_________\ \ \_______________\_\/
\ \ \ / / /
\ \ \/ / /
\ \/ / /
\/ / /
\/_/ -
接下来就是使用
vim ~/.bashrc编辑配置文件,加入neofetch -L | lolcat(显示系统信息则去掉-L参数)即可。也可以简化为:sudo echo 'neofetch -L | lolcat' >> ~/.bashrc。 -
运行
source ~/.bashrc更新配置(root用户下所有配置需要在配置一遍)。


- 补充一下:
apt install figlet,figlet是一款能够将文字转换为放大艺术字的命令。
- 关于
figlet参数:
-f xx指明字体风格:showfigfonts命令可以查看字体风格列表。-c设置居中显示。- 演示:
figlet I love python -f standard -c | lolcat- 除了使用
neofetch展示终端信息外,还可以使用apt install screenfetch,具体配置略。

2-配置子系统
安装net-tools和openssh-server
-
安装的子系统无法使用
ifconfig命令(需要安装net-tools),也无法通过SSH登录(需要安装openssh-server)。无法使用ip相关命令(需要安装iproute2) -
运行下面命令,安装:
1
2
3sudo apt install net-tools
sudo apt-get install openssh-server
sudo apt-get update & apt-get install -y iproute2 -
运行
sudo vim /etc/ssh/sshd_config修改ssh配置文件,此前可以先备个份。1
2
3
4
5
6Port 2222 # 默认22端口,和windows端口冲突换成2222,最后大于1024
AddressFamily any
ListenAddress 0.0.0.0 # 如果需要指定监听的IP则去除最左侧的井号,并配置对应IP,默认即监听PC所有IP
PasswordAuthentication yes # yes表示使用帐号密码方式登录
AllowUsers username # 允许使用的用户名(多个空格分隔),密码也是这个用户的密码
PermitRootLogin yes # 运行root用户登录(若配置AllowUsers,需包含root) -
运行
systemctl restart ssh重启ssh。通过systemctl start ssh启动ssh。 -
此后通过ssh登录
ssh 用户名@ip -p 端口号即可(通过-p参数指定端口号)。注意这里的ip使用localhost,127.0.0.1,``192.168.x.x` 等ip均可连接。 -
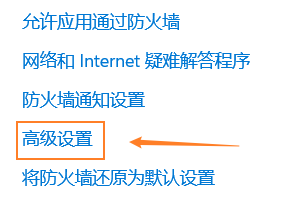
此外如果有需要,可以配置防火墙。设置中打开windows安全中心,选择:防火墙和网络保护–>高级设置。
-
选择入站规则,点击右侧新建。之后选择:端口–>tcp–>特定端口–>填入配置的ssh端口号。
- 如果ssh连接报错
WARNING: REMOTE HOST IDENTIFICATION HAS CHANGED!。删除C:\Users\yxlum\.ssh下的所有know-hosts文件中的同样ip的秘钥即可。- 提一嘴,若想使用
ip系列命令,可能需要安装apt-get update & apt-get install -y iproute2。
ssh端口被拒
- 运行
sudo apt-get install ufw安装防火墙。 - 运行
sudo ufw enable开启防火墙(一般运行sudo systemctl enable ufw设置防火墙自启!)。 - 运行
sudo ufw allow 2222设置防火墙充许2222端口对外开放。 - 通过
ssh连接,运行whoami查看用户,以检查配置是否成功 - 此外可使用命令查看端口是否开发
lsof -i:2222,。
安装vim
-
ubuntu系统不自带vim,需要手动安装。首先运行一下sudo apt-get update更新源。 -
运行
sudo apt-get install vim-gtk安装。 -
刚下载的
vim界面可能不友好,我们使用sudo vim /etc/vim/vimrc修改一下它的配置文件。1
2
3
4
5
6
7
8
9
10
11
12
13
14
15
16
17if has("syntax")
syntax on
endif
"语法高亮,注释了就要放开
"设置左侧行号
set nu
"设置tab键长度为4
set tabstop=4
"突出显示当前行
set cursorline
"在右下角显示光标位置的状态行
set ruler
"自动缩进
set autoindent
"覆盖文件时不备份
set nobackup -
使用
:wq!强制退出保存即可。
用不惯
vim可以安装一个sudo apt update && sudo apt install gedit安装gedit,在较高版本中已经可以使用gedit文本编辑器。适用于Linux的Windows 子系统(wsl)现在支持在Windows上以完全集成的桌面体验运行Linux GUI应用程序。
启用systemd
-
子系统中之前是无法运行
systemctl XX命令的。但是如今WSL已经支持systemd命令。 -
首先必须确保你的系统运行的是 0.67.6或更高版本的 WSL。运行
wsl --version查看版本。可以试验wsl --update更新不符合的旧版本。 -
运行
sudo vim /etc/wsl.conf修改配置文件,我的好像默认开启了。1
2[boot]
systemd=true -
运行
wsl --shutdown关闭WSL。
汉化
-
安装中文语言包
sudo apt install language-pack-zh-hans。 -
设置locale,运行命令
sudo vi /etc/locale.gen,在配置文件中找到zh_CN.UTF-8 UTF-8并取消注释。1
2
3zh_CN.GBK GBK
zh_CN.UTF-8 UTF-8
zh_HK BIG5-HKSCS -
运行
sudo locale-gen编译语言。 -
运行命令
sudo vim /etc/default/locale编辑配置文件,设置默认语言为中文。1
LANG=zh_CN.UTF-8
-
ok,重启终端就行了。
-
配置汉化man手册:
sudo apt install manpages-zh即可。此后man命令或者--help就可以显示汉语了。 -
此外,为了GUI的正常显示中文,还需要安装中文桌面环境:
1
2
3
4
5
6# 安装中文基础语言包(前面步骤中已安装,跳过)
sudo apt install language-pack-zh-hans
# 安装中文桌面语言包(gedit可以显示中文)
sudo apt install language-pack-gnome-zh-hans
sudo apt install language-pack-kde-zh-hans -
但是在GUI(例如
gedit)中暂时无法使用中文输入法,需要执行sudo apt install fonts-noto fcitx fcitx-pinyin安装拼音输入法。 -
最后需要运行
vim ~/.profile,编辑内容如下:1
2
3
4
5
6
7
8# 也可放在/etc/default/locale里面(这里省略,之前已经配置过了)
export LANG=zh_CN.UTF-8
# 也可放在/etc/environment里面
export INPUT_METHOD=fcitx # wayland输入法
export XMODIFIERS=@im=fcitx # x11输入法
export GTK_IM_MODULE=fcitx # gtk输入法
export QT_IM_MODULE=fcitx # qt输入法 -
运行
fcitx& > /dev/null运行fcitix即可。 -
运行
fcitx-autostart设置为开机自启。 -
此外还可以运行
fcitx-config-gtk3修改输入法快捷键等配置。
换源
-
说实话,下载速度还行,就不换了。他喵的安装
Gnone出问题了。 -
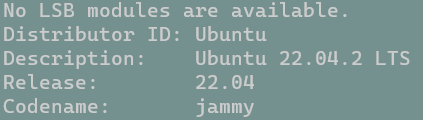
首先运行命令确认一下
lsb_release -a版本问题。其中Codename是版本代号。 -
运行命令
sudo cp /etc/apt/sources.list /etc/apt/sources.list.bak,修改镜像源前先备份一下原来的镜像源。 -
我们先运行
cat /etc/apt/sources.list查看原来的镜像源文本。1
2
3
4
5
6
7
8
9
10
11
12
13
14
15
16
17
18
19
20
21
22
23
24
25
26
27
28
29
30
31
32
33
34
35
36
37
38
39
40
41
42# See http://help.ubuntu.com/community/UpgradeNotes for how to upgrade to
# newer versions of the distribution.
deb http://archive.ubuntu.com/ubuntu/ jammy main restricted
# deb-src http://archive.ubuntu.com/ubuntu/ jammy main restricted
## Major bug fix updates produced after the final release of the
## distribution.
deb http://archive.ubuntu.com/ubuntu/ jammy-updates main restricted
# deb-src http://archive.ubuntu.com/ubuntu/ jammy-updates main restricted
## N.B. software from this repository is ENTIRELY UNSUPPORTED by the Ubuntu
## team. Also, please note that software in universe WILL NOT receive any
## review or updates from the Ubuntu security team.
deb http://archive.ubuntu.com/ubuntu/ jammy universe
# deb-src http://archive.ubuntu.com/ubuntu/ jammy universe
deb http://archive.ubuntu.com/ubuntu/ jammy-updates universe
# deb-src http://archive.ubuntu.com/ubuntu/ jammy-updates universe
## N.B. software from this repository is ENTIRELY UNSUPPORTED by the Ubuntu
## team, and may not be under a free licence. Please satisfy yourself as to
## your rights to use the software. Also, please note that software in
## multiverse WILL NOT receive any review or updates from the Ubuntu
## security team.
deb http://archive.ubuntu.com/ubuntu/ jammy multiverse
# deb-src http://archive.ubuntu.com/ubuntu/ jammy multiverse
deb http://archive.ubuntu.com/ubuntu/ jammy-updates multiverse
# deb-src http://archive.ubuntu.com/ubuntu/ jammy-updates multiverse
## N.B. software from this repository may not have been tested as
## extensively as that contained in the main release, although it includes
## newer versions of some applications which may provide useful features.
## Also, please note that software in backports WILL NOT receive any review
## or updates from the Ubuntu security team.
deb http://archive.ubuntu.com/ubuntu/ jammy-backports main restricted universe multiverse
# deb-src http://archive.ubuntu.com/ubuntu/ jammy-backports main restricted universe multiverse
deb http://security.ubuntu.com/ubuntu/ jammy-security main restricted
# deb-src http://security.ubuntu.com/ubuntu/ jammy-security main restricted
deb http://security.ubuntu.com/ubuntu/ jammy-security universe
# deb-src http://security.ubuntu.com/ubuntu/ jammy-security universe
deb http://security.ubuntu.com/ubuntu/ jammy-security multiverse
# deb-src http://security.ubuntu.com/ubuntu/ jammy-security multiverse -
几个常用的镜像源地址:
1
2
3
4阿里云镜像源:http://mirrors.aliyun.com/ubuntu/
网易镜像源:http://mirrors.163.com/ubuntu/
清华大学镜像源:https://mirrors.tuna.tsinghua.edu.cn/ubuntu/
中国科学技术大学镜像源:https://mirrors.ustc.edu.cn/ubuntu/ -
我们将上述文件中的有效部分的
http://security.ubuntu.com/ubuntu/换为镜像源,例如清华镜像https://mirrors.tuna.tsinghua.edu.cn/ubuntu/得:1
2
3
4
5
6
7
8
9
10
11
12
13
14
15deb https://mirrors.tuna.tsinghua.edu.cn/ubuntu/ jammy main restricted
deb https://mirrors.tuna.tsinghua.edu.cn/ubuntu/ jammy-updates main restricted
deb https://mirrors.tuna.tsinghua.edu.cn/ubuntu/ jammy universe
deb https://mirrors.tuna.tsinghua.edu.cn/ubuntu/ jammy-updates universe
deb https://mirrors.tuna.tsinghua.edu.cn/ubuntu/ jammy multiverse
deb https://mirrors.tuna.tsinghua.edu.cn/ubuntu/ jammy-updates multiverse
deb https://mirrors.tuna.tsinghua.edu.cn/ubuntu/ jammy-backports main restricted universe multiverse
deb https://mirrors.tuna.tsinghua.edu.cn/ubuntu/ jammy-security main restricted
deb https://mirrors.tuna.tsinghua.edu.cn/ubuntu/ jammy-security universe
deb https://mirrors.tuna.tsinghua.edu.cn/ubuntu/ jammy-security multiverse1
2
3
4
5
6
7
8
9
10
11
12
13
14
15
16# 清华镜像源出了点问题改用中科大
deb https://mirrors.ustc.edu.cn/ubuntu/ jammy main restricted
deb https://mirrors.ustc.edu.cn/ubuntu/ jammy-updates main restricted
deb https://mirrors.ustc.edu.cn/ubuntu/ jammy universe
deb https://mirrors.ustc.edu.cn/ubuntu/ jammy-updates universe
deb https://mirrors.ustc.edu.cn/ubuntu/ jammy multiverse
deb https://mirrors.ustc.edu.cn/ubuntu/ jammy-updates multiverse
deb https://mirrors.ustc.edu.cn/ubuntu/ jammy-backports main restricted universe multiverse
deb https://mirrors.ustc.edu.cn/ubuntu/ jammy-security main restricted
deb https://mirrors.ustc.edu.cn/ubuntu/ jammy-security universe
deb https://mirrors.ustc.edu.cn/ubuntu/ jammy-security multiverse -
运行
sudo vim /etc/apt/sources.list编辑,使用上述内容替换。:wq!保存。 -
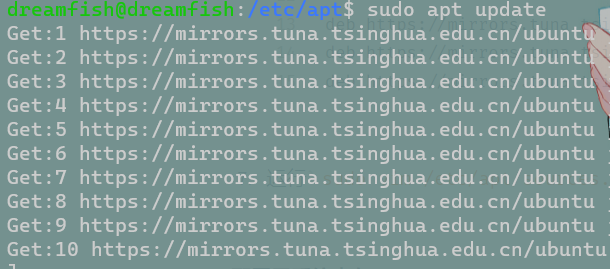
运行
sudo apt update更新源,检查配置是否成功。
配置子系统内存(不会待补)
.wslconfig用于在 WSL上运行的所有已安装分发中全局配置设置。存储在目录中%UserProfile%。通常是用户配置文件C:\Users\<UserName>\.wslconfig。wsl.conf用于为WSL上运行的Linux发行版配置每个发行版的设置。以unix文件的形式存储在/etc分发的目录中。- 但是我不会配置。
1 | .wslconfig文件 |
1 | wsl.conf文件 |
安装vscode
-
首先在windows的主机上安装vs code(当然你也可以安装
insiders版本),并且配置环境变量。 -
在vscode安装插件
Remote - WSL。 -
在wsl的linux子系统安装一些库:
1
2sudo apt-get update
sudo apt-get install wget ca-certificates -
之后在wls中使用
code .命令即可打开vscode。注意发行版vscode使用code-insiders .。
安装aria2
-
打开wsl的ubuntu子系统,运行
sudo apt-get update && sudo apt-get install aria2安装aria2。 -
创建aria2配置文件如下:
1
2
3
4sudo mkdir /etc/aria2 #新建文件夹
sudo touch /etc/aria2/aria2.session #新建session文件
sudo chmod 777 /etc/aria2/aria2.session #设置aria2.session可写
sudo gedit /etc/aria2/aria2.conf #创建配置文件 -
运行
sudo vim /etc/aria2/aria2.conf编辑配置文件:1
2
3
4
5
6
7
8
9
10
11
12
13
14
15
16
17
18
19
20
21
22
23
24
25
26
27
28
29
30
31
32
33
34
35
36
37
38
39
40
41
42
43
44
45
46
47
48
49
50
51
52
53
54
55
56
57
58
59
60
61
62
63
64
65
66
67
68
69
70
71
72
73
74
75
76
77
78
79
80
81
82
83
84
85
86
87
88
89
90
91
92
93
94
95
96
97
98
99
100
101
102
103
104
105
106
107
108
109
110
111
112
113
114
115
116
117
118
119
120
121
122
123
124
125
126
127
128
129
130
131
132
133
134
135
136
137
138
139
140
141
142
143
144
145
146
147
148
149
150
151## 全局设置 ## ============================================================
# 日志
#log-level=warn
#log=/PATH/.aria2/aria2.log
# 后台运行
#daemon=true
# 下载位置, 默认: 当前启动位置
dir=/mnt/d/download/aria2
# 从会话文件中读取下载任务(***)
input-file=/etc/aria2/aria2.session
# 在Aria2退出时保存`错误/未完成`的下载任务到会话文件(***)
save-session=/etc/aria2/aria2.session
# 定时保存会话, 0为退出时才保存, 需1.16.1以上版本, 默认:0
save-session-interval=30
# 断点续传
continue=true
# 启用磁盘缓存, 0为禁用缓存, 需1.16以上版本, 默认:16M
#disk-cache=32M
# 文件预分配方式, 能有效降低磁盘碎片, 默认:prealloc
# 预分配所需时间: none < falloc ? trunc < prealloc
# falloc和trunc则需要文件系统和内核支持
# NTFS建议使用falloc, EXT3/4建议trunc, MAC 下需要注释此项
file-allocation=none
# 客户端伪装
user-agent=Mozilla/5.0 (X11; Linux x86_64) AppleWebKit/537.36 (KHTML, like Gecko) Chrome/90.0.4430.93 Safari/537.36
# 禁用IPv6, 默认:false
disable-ipv6=true
# 其他
always-resume=true
check-integrity=true
## 下载位置 ## ============================================================
# 最大同时下载任务数, 运行时可修改, 默认:5
max-concurrent-downloads=3
# 同一服务器连接数, 添加时可指定, 默认:1
max-connection-per-server=16
# 最小文件分片大小, 添加时可指定, 取值范围1M -1024M, 默认:20M
# 假定size=10M, 文件为20MiB 则使用两个来源下载; 文件为15MiB 则使用一个来源下载
min-split-size=10M
# 单个任务最大线程数, 添加时可指定, 默认:5
split=64
# 整体下载速度限制, 运行时可修改, 默认:0
#max-overall-download-limit=0
# 单个任务下载速度限制, 默认:0
#max-download-limit=0
# 整体上传速度限制, 运行时可修改, 默认:0
#max-overall-upload-limit=0
# 单个任务上传速度限制, 默认:0
#max-upload-limit=0
## RPC设置 ## ============================================================
# 启用RPC, 默认:false
enable-rpc=true
# 允许所有来源, 默认:false
rpc-allow-origin-all=true
# 允许非外部访问, 默认:false
rpc-listen-all=true
# 事件轮询方式, 取值:[epoll, kqueue, port, poll, select], 不同系统默认值不同
#event-poll=select
# RPC监听端口, 端口被占用时可以修改, 默认:6800
rpc-listen-port=6800
# 设置的RPC授权令牌, v1.18.4新增功能, 取代 --rpc-user 和 --rpc-passwd 选项
#rpc-secret=<TOKEN>
# 是否启用 RPC 服务的 SSL/TLS 加密,
# 启用加密后 RPC 服务需要使用 https 或者 wss 协议连接
#rpc-secure=true
# 在 RPC 服务中启用 SSL/TLS 加密时的证书文件,
# 使用 PEM 格式时,您必须通过 --rpc-private-key 指定私钥
#rpc-certificate=/path/to/certificate.pem
# 在 RPC 服务中启用 SSL/TLS 加密时的私钥文件
#rpc-private-key=/path/to/certificate.key
## BT/PT下载相关 ## ============================================================
# 当下载的是一个种子(以.torrent结尾)时, 自动开始BT任务, 默认:true
#follow-torrent=true
# BT监听端口, 当端口被屏蔽时使用, 默认:6881-6999
listen-port=51413
# 单个种子最大连接数, 默认:55
#bt-max-peers=55
# 打开DHT功能, PT需要禁用, 默认:true
enable-dht=false
# 打开IPv6 DHT功能, PT需要禁用
#enable-dht6=false
# DHT网络监听端口, 默认:6881-6999
#dht-listen-port=6881-6999
dht-file-path=/opt/var/aria2/dht.dat
dht-file-path6=/opt/var/aria2/dht6.dat
# 本地节点查找, PT需要禁用, 默认:false
#bt-enable-lpd=false
# 种子交换, PT需要禁用, 默认:true
enable-peer-exchange=false
# 每个种子限速, 对少种的PT很有用, 默认:50K
#bt-request-peer-speed-limit=50K
# 设置 peer id 前缀
peer-id-prefix=-TR2770-
# 当种子的分享率达到这个数时, 自动停止做种, 0为一直做种, 默认:1.0
seed-ratio=0
# 强制保存会话, 即使任务已经完成, 默认:false
# 较新的版本开启后会在任务完成后依然保留.aria2文件
#force-save=false
# BT校验相关, 默认:true
#bt-hash-check-seed=true
# 继续之前的BT任务时, 无需再次校验, 默认:false
bt-seed-unverified=true
# 保存磁力链接元数据为种子文件(.torrent文件), 默认:false
bt-save-metadata=true
bt-max-open-files=16
# Http/FTP 相关
connect-timeout=120 -
运行
sudo aria2c --conf-path=/etc/aria2/aria2.conf检查安装是否完成。 -
封装为服务,运行
sudo vim /etc/systemd/system/aria2c.service添加自定义服务(如下,需要去注释):1
2
3
4
5
6
7
8
9
10[Unit]
Description=Aria2c Service # 服务的描述
After=network.target # 服务在网络可用后启动
[Service]
Type=simple # 服务的启动类型,simple 表示主进程就是执行命令
User=nobody # 服务以 nobody 用户身份运行
ExecStart=/usr/bin/aria2c --conf-path=/etc/aria2/aria2.conf --enable-rpc --rpc-listen-all # 服务的执行命令,指定配置文件和 RPC 参数
[Install]
WantedBy=multi-user.target # 服务属于多用户目标组,即图形界面模式 -
运行并设置自启
sudo systemctl start aria2c && sudo systemctl enable aria2c。 -
接下来安装web面板如 AriaNg、webui-aria2、yaaw 等,太麻烦。直接在浏览器装了个YAAM插件,开摆。

arria2c一些常用的命令参数:
-d或者--dir:指定下载文件的目录。-o或者--out:指定下载文件的文件名。-s或者--split:指定每个文件使用的连接数。-x或者--max-connection-per-server:指定每个服务器使用的最大连接数。-j或者--max-concurrent-downloads:指定最大同时下载数。-c或者--continue:继续下载部分下载的文件。--file-allocation:指定文件分配方法,可以是none, prealloc, trunc或falloc。--input-file:从指定的文件中读取下载URI列表。--conf-path:指定配置文件的路径。--no-conf:不读取配置文件,只使用命令行选项。--enable-rpc:启用JSON-RPC/XML-RPC服务器。--rpc-listen-port:指定JSON-RPC/XML-RPC服务器监听的端口号。--rpc-secret:指定JSON-RPC/XML-RPC服务器的认证密钥。
安装jdk
- 安装如下配置安装jdk,然后就能在idea和vscode中使用了。
1 | # 安装 |
安装anaconda
-
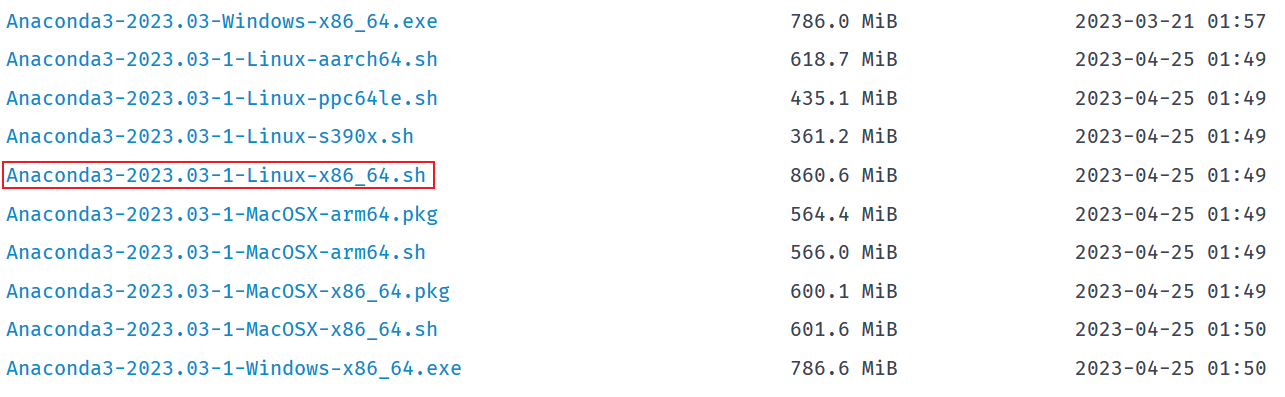
安装anaconda安装包,可以去清华镜像下载对应linux版本的安装包。当然也可以使用
weget命令下载。 -
前往安装包所在位置,进行安装。
1
2
3
4cd /mnt/d/download/edge/ #进入安装包所在目录
bash ./Anaconda3-2023.03-1-Linux-x86_64.sh #安装,不需要修改配置,过程中输入yes即可
echo 'export PATH="~/anaconda3/bin:$PATH"' >> ~/.bashrc # 配置环境(这里是默认安装位置)
source ~/.bashrc # 使环境配置生效 -
运行
conda检查安装是否成功。 -
配置镜像源,这里还是选择清华镜像源。运行
conda config --set show_channel_urls yes生成配置文件,并运行vim ~/.condarc编辑配置文件。1
2
3
4
5
6
7
8
9
10
11
12
13
14
15
16channels:
- defaults
show_channel_urls: true
default_channels:
- https://mirrors.tuna.tsinghua.edu.cn/anaconda/pkgs/main
- https://mirrors.tuna.tsinghua.edu.cn/anaconda/pkgs/r
- https://mirrors.tuna.tsinghua.edu.cn/anaconda/pkgs/msys2
custom_channels:
conda-forge: https://mirrors.tuna.tsinghua.edu.cn/anaconda/cloud
msys2: https://mirrors.tuna.tsinghua.edu.cn/anaconda/cloud
bioconda: https://mirrors.tuna.tsinghua.edu.cn/anaconda/cloud
menpo: https://mirrors.tuna.tsinghua.edu.cn/anaconda/cloud
pytorch: https://mirrors.tuna.tsinghua.edu.cn/anaconda/cloud
pytorch-lts: https://mirrors.tuna.tsinghua.edu.cn/anaconda/cloud
simpleitk: https://mirrors.tuna.tsinghua.edu.cn/anaconda/cloud
deepmodeling: https://mirrors.tuna.tsinghua.edu.cn/anaconda/cloud/ -
运行
conda clean -i清除索引缓存,保证用的是镜像站提供的索引。 -
配置
pip清华镜像源:pip config set global.index-url https://pypi.tuna.tsinghua.edu.cn/simple。 -
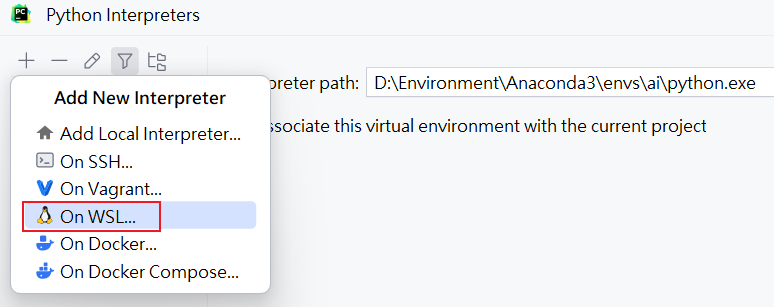
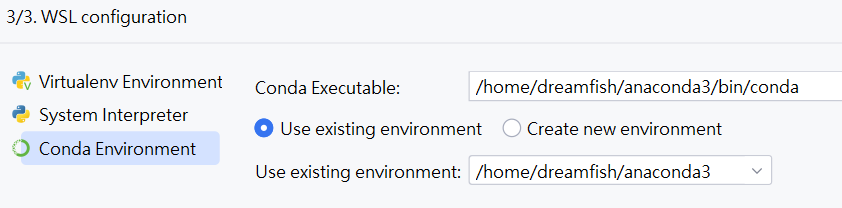
好了,这就可以在pycharm中使用了。
安装chrome
-
适用于Linux的Windows 子系统(wsl)现在支持在Windows上以完全集成的桌面体验运行Linux GUI应用程序。
-
Chrome 不是一个开源的浏览器,并且它不被包含在标准的ubuntu软件源中。我们将会从官方网站下载安装文件,并且通过命令行工具来安装它。
1
2
3wget https://dl.google.com/linux/direct/google-chrome-stable_current_amd64.deb
sudo apt-get update
sudo apt install ./google-chrome-stable_current_amd64.deb -
安装中文字体,不然chrome乱码:
1
2sudo apt install fonts-wqy-microhei ttf-wqy-zenhei # 安装中文字体
fc-list :lang=zh-cn # 查看已安装的中文字体 -
运行
google-chrome打开chrome浏览器。
git代理
-
git下载有点慢,可以配置一下代理。
-
全局代理,所有网址(不推荐):
1
2
3
4
5
6#使用http代理
git config --global http.proxy http://127.0.0.1:58591
git config --global https.proxy https://127.0.0.1:58591
#使用socks5代理
git config --global http.proxy socks5://127.0.0.1:51837
git config --global https.proxy socks5://127.0.0.1:51837 -
只对github代理(推荐):
1
2
3
4#使用socks5代理(推荐)
git config --global http.https://github.com.proxy socks5://127.0.0.1:51837
#使用http代理(不推荐)
git config --global http.https://github.com.proxy http://127.0.0.1:58591 -
取消代理:
1
2
3
4
5
6
7# 取消全局代理
git config --global --unset http.proxy
git config --global --unset https.proxy
# 取消github代理
git config --global --unset http.https://github.com.proxy
git config --global --unset http.http://github.com.proxy -
查看代理:
1
2
3
4
5git config --global --get http.proxy
git config --global --get https.proxy
git config --list # 查看git配置
git config --global --edit #编辑git配置 -
开启防火墙和代理端口号(非ubuntu):
-
(非ubuntu)首先防火墙并设置为开机自启:
systemctl start firewalld和systemctl enable firewalld。当然如果没有安装需要先安装sudo apt install firewalld。 -
(非ubuntu)关于端口号开放命令:
--zone指明作用域 、--add-port=1935/tcp添加端口,格式为:端口/通讯协议 、--permanent永久生效,没有此参数重启后失效 。1
2
3
4
5
6
7sudo firewall-cmd --zone=public --add-port=99999/tcp --permanent # 开放单个端口
sudo firewall-cmd --zone=public --add-port=20000-29999/tcp --permanent # 开放多个端口
sudo firewall-cmd --zone=public --remove-port=80/tcp --permanent # 关闭端口号
sudo firewall-cmd --zone=public --query-port=80/tcp #查看端口号是否开放 -
注意
ubuntu不适用上述配置,而是使用sudo ufw allow 400即可。 -
端口号查看命令:
1
2
3lsof -i:8888, # 查看端口号占用情况,无返回值则未启用(有逗号)
netstat -tunlp|grep 8888 # 查看端口号进程情况 -
关于端口号分配:
- 公认端口(Well Known Ports):
0-1023之间的端口号,也叫Well Known ports。这些端口由 IANA 分配管理。IANA 把这些端口分配给最重要的一些应用程序,让所有的用户都知道,当一种新的应用程序出现后,IANA必须为它指派一个公认端口。 - 注册端口(Registered Ports):
1024-49151。是公司和其他用户向互联网名称与数字地址分配机构(ICANN)登记的端口号,利用因特网的传输控制协议(TCP)和用户数据报协议(UDP)进行通信的应用软件需要使用这些端口。在大多数情况下,这些应用软件和普通程序一样可以被非特权用户打开。 - 客户端使用的端口号:
49152~65535。这类端口号仅在客户进程运行时才动态选择,因此又叫做短暂端口号。被保留给客户端进程选择暂时使用的。也可以理解为,客户端启动的时候操作系统随机分配一个端口用来和服务器通信,客户端进程关闭下次打开时,又重新分配一个新的端口。
- 公认端口(Well Known Ports):
-
-
好了,搞笑的部分来了,上述配置在
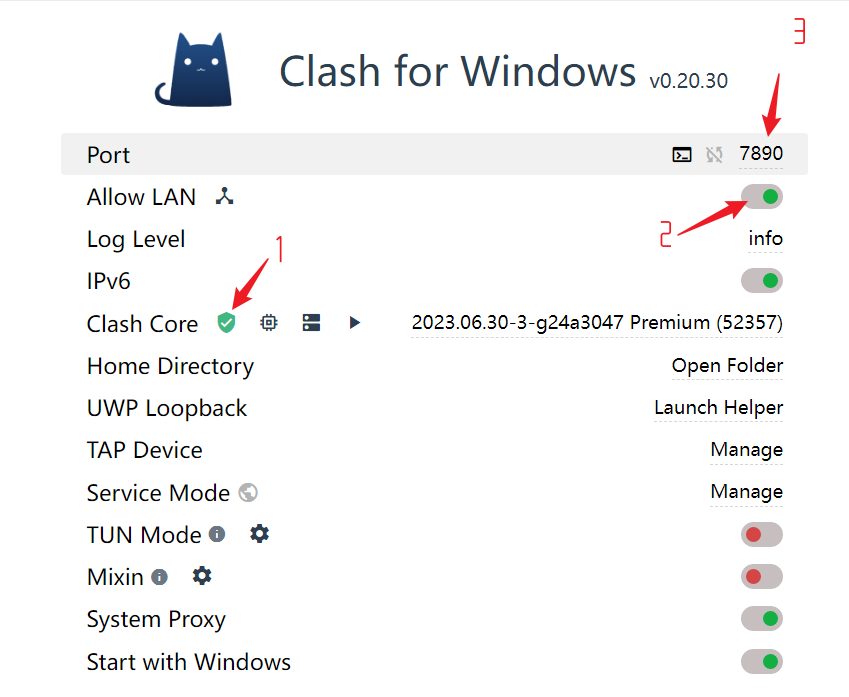
wsl没啥用。为了正常连接使用github,我们直接让wsl连接主机的代理软件:-
windows下的代理软件要设置为允许LAN连接,也就是允许局域网连接。同时记住代理软件的端口号,并在防火墙中允许该clash内核。
-
其次要知道通过在Linux分发版中运行以下命令来获取主机的
IP地址:cat /etc/resolv.conf,主机ip就在nameserver字段中。 -
使用
vim ~/.bashrc编辑配置文件,加入下面内容:1
2
3
4
5
6
7
8
9
10
11
12
13
14
15
16
17
18hostip=$(cat /etc/resolv.conf |grep -oP '(?<=nameserver\ ).*') # 获取ip地址
proxyPort=端口号 # 获取端口号
PROXY_HTTP="http://${hostip}:${proxyPort}" #git代理地址(http协议可改为socks5)
# PROXY_HTTP="socks5://${hostip}:${proxyPort}"
# 使用http协议(http、socks5协议二选一)
export https_proxy="http://${hostip}:${proxyPort}"
export http_proxy="http://${hostip}:${proxyPort}"
# 端口号相同时可以写为一句:export all_proxy="http://${hostip}:${proxyPort}"
# 使用socket5协议(http、socks5协议二选一)
export https_proxy="socks5://${hostip}:${proxyPort}"
export http_proxy="socks5://${hostip}:${proxyPort}"
# 端口号相同时可以写为一句:export all_proxy="socks5://${hostip}:${proxyPort}"
# git代理
git config --global http.https://github.com.proxy ${PROXY_HTTP}
git config --global https.https://github.com.proxy ${PROXY_HTTP} -
但是上述关闭代理比较麻烦,我们可以使用
alias创建别名命令,proxy启动代理、unproxy关闭代理、echoproxy查看代理。同理使用vim ~/.bashrc编辑配置文件,加入下面内容:1
2
3
4
5
6
7
8
9
10
11
12
13
14
15
16
17
18
19
20
21
22
23
24
25
26
27
28
29
30
31
32
33
34
35
36hostip=$(cat /etc/resolv.conf |grep -oP '(?<=nameserver\ ).*') # 获取ip地址
proxyPort=端口号
PROXY_HTTP="http://${hostip}:${proxyPort}" #git代理地址(http协议可改为socks5)
# PROXY_HTTP="socks5://${hostip}:${proxyPort}"
alias proxy='
# 使用http协议(http、socks5协议二选一)
export https_proxy="http://${hostip}:${proxyPort}"
export http_proxy="http://${hostip}:${proxyPort}"
# 端口号相同时可以写为一句:export all_proxy="http://${hostip}:${proxyPort}"
# 使用socket5协议(http、socks5协议二选一)
export https_proxy="socks5://${hostip}:${proxyPort}"
export http_proxy="socks5://${hostip}:${proxyPort}"
# 端口号相同时可以写为一句:export all_proxy="socks5://${hostip}:${proxyPort}"
# git代理
git config --global http.https://github.com.proxy ${PROXY_HTTP}
git config --global https.https://github.com.proxy ${PROXY_HTTP}
'
alias unproxy='
unset https_proxy
unset http_proxy
# unset all_proxy
git config --global --unset http.https://github.com.proxy
git config --global --unset http.http://github.com.proxy
'
alias echoproxy='
echo $https_proxy
echo $http_proxy
# echo all_proxy
'
# 开机自启代理
proxy -
执行
source ~/.bashrc使配置生效。 -
运行
proxy启动代理,运行curl www.google.com测试代理是否配置成功。 -
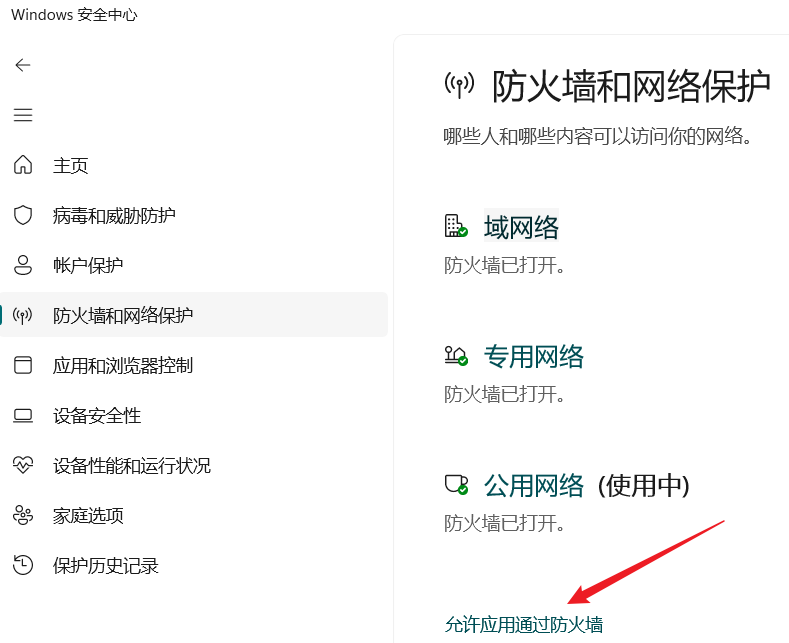
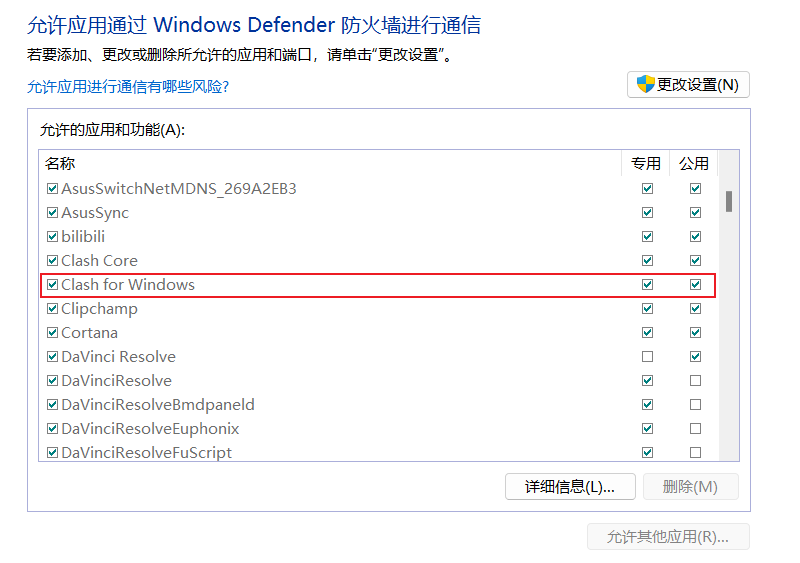
关于clash防火墙的问题:打开windows安全中心,选择防火墙和网络保护,点击运行应用通过防火墙,然后再弹出界面找到代理软件,勾选即可。
-
postgresql(失败)
-
参照官网,针对ubuntu的具体安装步骤:
1
2
3
4
5
6
7
8
9# 创建文件存储库配置
sudo sh -c 'echo "deb http://apt.postgresql.org/pub/repos/apt $(lsb_release -cs)-pgdg main" > /etc/apt/sources.list.d/pgdg.list'
# 导入存储库签名密钥
wget --quiet -O - https://www.postgresql.org/media/keys/ACCC4CF8.asc | sudo apt-key add -
# 安装
sudo apt-get update
sudo apt-get -y install postgresql -
默认创建一个新root用户
postgres,使用sudo passwd postgres设置密码。 -
切换
sudo -i -u postgres用户,在postgres用户下输入psql打开数据库。 -
接下来配置中如果出现错误:
-
postgres不在sudoers文件中。此事将被报告。- 切换到
root用户,运行chmod 640 /etc/sudoers给予对该文件的写全权限。 - 使用
vim /etc/sudoers编辑文件:
1
2
3
4
5
6
7
8# User privilege specification 用户权限规范
root ALL=(ALL:ALL) ALL
postgres ALL=(ALL:ALL) ALL
# Members of the admin group may gain root privileges 用户组
%admin ALL=(ALL) ALL
# Allow members of group sudo to execute any command 用户组
%sudo ALL=(ALL:ALL) ALL - 切换到
-
用户 “postgres” Password 认证 失败:
psql -U postgres
-
-
编辑
vim /etc/postgresql/15/main/pg_hba.conf(15是版本),允许所有主机使用密码登录:1
host all all 0.0.0.0/0 md5
-
编辑
vim /etc/postgresql/12/main/postgresql.conf(15是版本),查看端口:1
2
3
4
5
6
7#listen_addresses = 'localhost' # what IP address(es) to listen on;
# comma-separated list of addresses;
# defaults to 'localhost'; use '*' for all
# (change requires restart)
listen_addresses = '*' # 添加
port = 5432 # (change requires restart)
max_connections = 100 # (change requires restart) 66 #superuser_reserved_connections = 3 # (change requires restart) -
ubuntu开放端口5432,即sudo ufw allow 5432。 -
连接:
psql -U username -h hostname -p port -d dbname。 -
服务启关命令:
1
2
3
4sudo systemctl stop postgresql
sudo systemctl start postgresql
sudo systemctl status postgresql
sudo systemctl restart postgresql