
windows和wsl美化
windows terminal
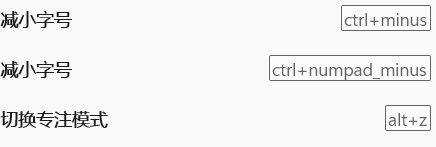
CTRL+SHIFT+,打开配置文件。终端专注模式:
CTRL+SHIFT+P打开搜索切换专注模式(退出也是这种方式)。cmd输入
wt/f也可进入专注模式(win+R也行)。直接在设置中为切换专注模式设置一个快捷键,例如
ALT+Z即可。
powershell
-
安装
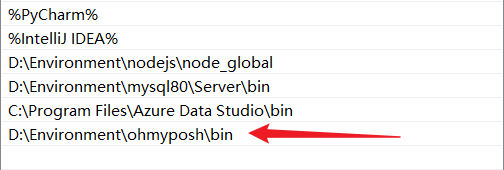
oh-my-posh,实际详细配置参考官网。下面命令均使用管理员权限下的powershell运行。 -
winget install JanDeDobbeleer.OhMyPosh -s winget --location xxx安装oh-my-posh到指定位置。当然你也可以使用命令winget upgrade JanDeDobbeleer.OhMyPosh -s winget --location xxx更新。 -
配置
oh-my-posh环境。
-
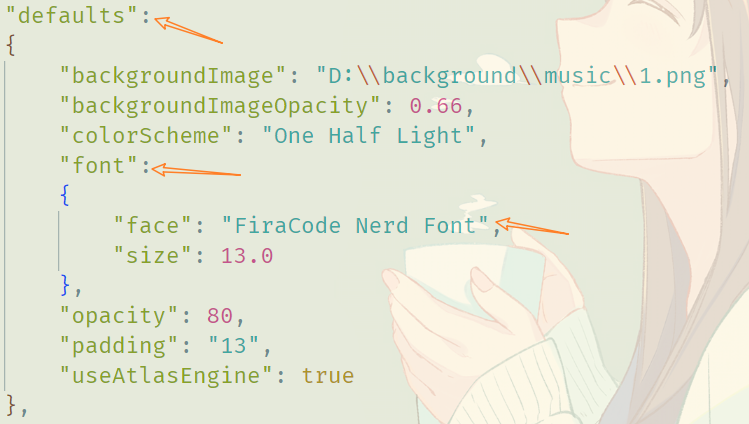
安装推荐字体进入Nerd Fonts随便下载一款字体(但个人推荐
FiraCode Nerd Font,Caskaydia Cove Nerd Font也还行),并在windows上安装。 -
终端下使用
CTRL + SHIFT + ,打开配置文件,配置全局字体。当然也可以直接在windows terminal设置中配置字体。(更推荐FiraCode Nerd Font)。 -
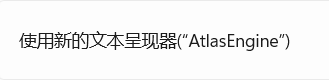
此外建议在
设置->呈现中开启windows terminal文本呈现器。此外在设置->外观中开启亚力克材料效果。在各个配置文件的外观->透明度中启用亚力克材料。 -
powershell运行
get-Poshthemes查看所有主题。 -
powershell运行
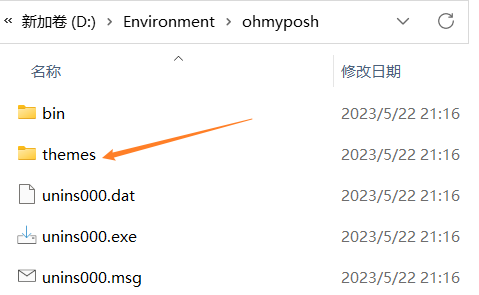
notepad $profile编辑powershell配置文件。其中--config后面接主题配置的文件位置(全部在oh-my-posh安装目录的themes目录下)。(night-owl、neko、montys不错)1
oh-my-posh --init --shell pwsh --config D:\Environment\ohmyposh\themes\neko.omp.json | Invoke-Expression
-
运行
. $profile使配置生效。 -
使用如下命令,下载美化终端的图标。
1
Install-Module -Name Terminal-Icons -Repository PSGallery
-
notepad $profile编辑powershell配置文件。1
2Import-Module -Name Terminal-Icons
oh-my-posh --init --shell pwsh --config D:\Environment\ohmyposh\themes\atomic.omp.json | Invoke-Expression -
运行
. $profile使配置生效。 -
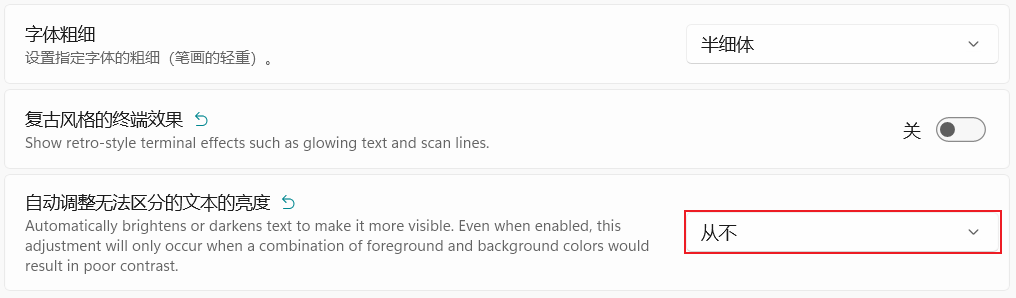
强调一下window终端下的一个配置,开启自动调整无法区分的文本的亮度可能会导致某些主题无法正常显示:

cmd美化
-
下载clink工具,安装一个已知位置。
-
然后,进入clink安装目录,创建
oh-my-posh.lua文件,添加如下内容:1
load(io.popen('oh-my-posh init cmd'):read("*a"))()
-
或者使用指定主题:
1
load(io.popen('oh-my-posh init cmd --config D:\\Environment\\ohmyposh\\themes\\atomic.omp.json'):read("*a"))()
配色
-
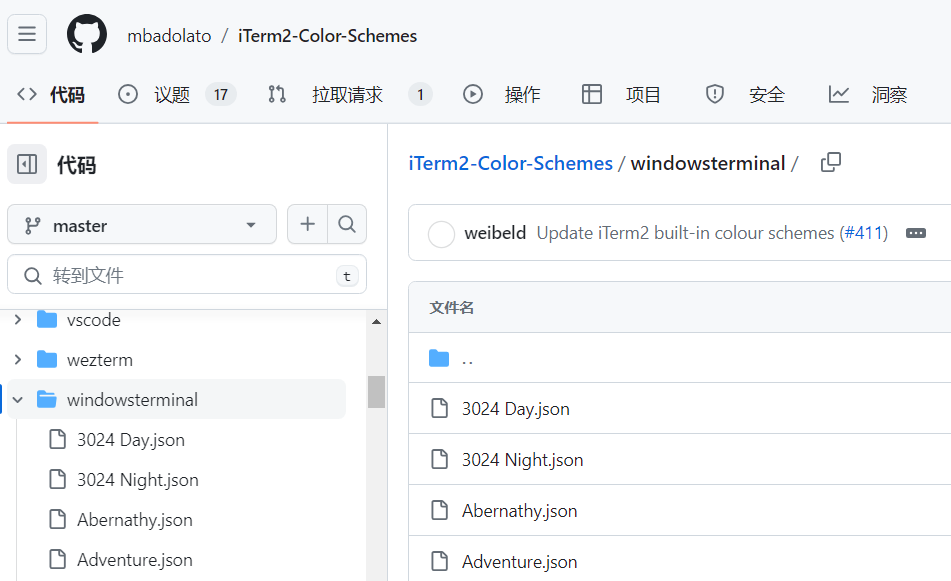
自定义配色很繁琐,而且很好费时间,最好的方法是用别人做好的配色。可以在github项目 iTerm2-Color-Schemes)里找,有两百多方案,先在 Screenshots 里挑选好颜色,然后到
windwosterminal目录对应的 json 文件复制样式。 -
将样式粘贴到windwos terminal配置文件的
schemes数组中即可。1
2
3
4
5
6
7
8
9
10
11
12
13
14
15
16
17
18
19
20
21
22
23
24
25
26"schemes":
[
{
"background": "#F7F7F7",
"black": "#090300",
"blue": "#01A0E4",
"brightBlack": "#5C5855",
"brightBlue": "#807D7C",
"brightCyan": "#CDAB53",
"brightGreen": "#3A3432",
"brightPurple": "#D6D5D4",
"brightRed": "#E8BBD0",
"brightWhite": "#F7F7F7",
"brightYellow": "#4A4543",
"cursorColor": "#4A4543",
"cyan": "#B5E4F4",
"foreground": "#4A4543",
"green": "#01A252",
"name": "3024 Day", //配色方案名称
"purple": "#A16A94",
"red": "#DB2D20",
"selectionBackground": "#A5A2A2",
"white": "#A5A2A2",
"yellow": "#FDED02"
},
] -
之后通过
name在windwosterminal设置中使用即可。 -
其他配色网站。
隐藏启动信息
-
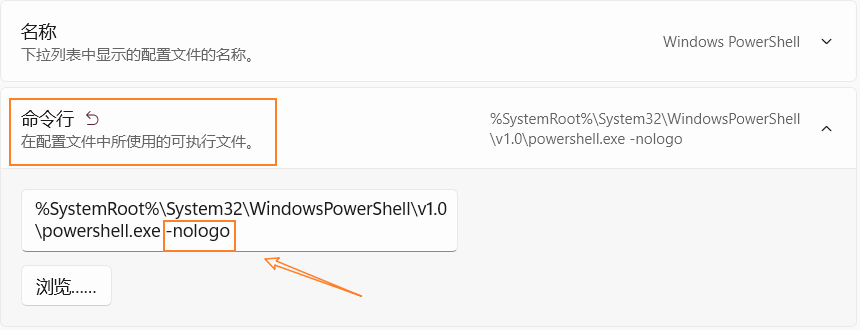
windwosterminal打开powershell时,会有显示一些版本和加载信息。
-
我们可以通过设置,对每个配置文件的的命令行配置中添加
-nologo参数即可。1
gsudo.exe %SystemRoot%\System32\cmd.exe -nologo
gsudo
-
安装 gsudo 只需要一条 Powershell 指令就行:
1
PowerShell -Command "Set-ExecutionPolicy RemoteSigned -scope Process; iwr -useb https://raw.githubusercontent.com/gerardog/gsudo/master/installgsudo.ps1 | iex"
-
安装过程中会问你是否要使用
sudo作为gsudo的别名,我这里选择是。安装完后重启,环境变量生效后就可以使用sudo来快速跳转到管理员级别的 Powershell 了。
ubuntu子系统(wsl)
zsh和oh-my-zsh
-
运行
apt-get install zsh安装zsh。并用zsh --version检查是否安装成功 。 -
运行
sudo vim /etc/passwd将zsh设为当前用户默认。或者使用chsh -s $(which zsh)命令将当前用户的shell修改为zsh。注意只需添加当前用户即可。1
fish:x:1001:1001::/home/fish:/bin/zsh
-
安装
oh-my-zsh,三种方式:1
2
3
4
5
6
7
8
9
10
11
12
13
14
15
16
17curl
sudo apt install curl
sh -c "$(curl -fsSL https://raw.githubusercontent.com/ohmyzsh/ohmyzsh/master/tools/install.sh)"
wget
sh -c "$(wget -O- https://raw.githubusercontent.com/ohmyzsh/ohmyzsh/master/tools/install.sh)"
fetch
sh -c "$(fetch -o - https://raw.githubusercontent.com/ohmyzsh/ohmyzsh/master/tools/install.sh)"
前几种不行,就手动安装(这里注意文件夹是oh-my-zsh,没有.)(建议使用国内镜像)
git clone https://github.com/robbyrussell/oh-my-zsh # 下载源码
cd ~/oh-my-zsh/tools # 执行安装命令
sh install.sh # 安装
ls -a ~ # 查看.oh-my-zsh/目录
uninstall_oh_my_zsh #卸载 -
安装目录是
~/.oh-my-zsh/themes/,可以使用ls命令查看主题(~表示当前用户目录)。 -
vim ~/.zshrc编辑文件设置喜欢的主题,其实就是修改ZSH_THEME,过程如下:1
2ls ~/.oh-my-zsh/themes
vim ~/.zshrc # 设置 ZSH_THEME="cloud" -
运行
source ~/.zshrc重新加载配置文件。 -
当然你也可以在官网查看不同主题。
-
由于 oh-my-zsh下主题的表现没有oh-my-posh的表现好,我决定装一个powerlevel10k,这款主题也是非常得受欢迎。
git clone --depth=1 https://gitee.com/romkatv/powerlevel10k.git ${ZSH_CUSTOM:-$HOME/.oh-my-zsh/custom}/themes/powerlevel10k -
装完后使用
vim ~/.zshrc配置好ZSH_THEME="powerlevel10k/powerlevel10k" -
重启终端你就可以看到配置界面(没有看到也可以使用
p10k configure指令手动调出)。其他一些命令:1
2
3
4
5
6
7
8
9
10
11列出主题中包含的所有图标的名称
get_icon_names
禁用P9k/P10k
prompt_powerlevel9k_teardown
启用P9k/P10k
prompt_powerlevel9k_setup
配置p10k
p10k configure -
zsh自带了很多的插件,相关的文件都放在了~/.oh-my-zsh/plugins目录中。默认使用Git插件,能提供 Git状态颜色编码和提示符。要想使用其他自带的插件,只需要编辑~/.zshrc文件,添加插件名称即可。 -
安装几个插件:
1
2
3
4
5
6
7
8
9
10
11ubuntu安装git
sudo apt update
sudo apt install git
zsh-syntax-highlighting:终端命令语法高亮
git clone https://github.com/zsh-users/zsh-syntax-highlighting ~/.oh-my-zsh/plugins/zsh-syntax-highlighting
zsh-autosuggestions:自动补全
git clone https://github.com/zsh-users/zsh-autosuggestions ~/.oh-my-zsh/plugins/zsh-autosuggestions -
vim ~/.zshrc编辑文件,添加插件:1
2
3
4
5plugins=(
... # 之前已经声明的插件名称
zsh-autosuggestions
zsh-syntax-highlighting
) -
运行
source ~/.zshrc重新加载配置文件。 -
提一下,上述配置只对当前用户生效,文件都在用户目录下。
- 似乎使用
zsh在配置环境变量方面有些不同,后续待补。- 可参考
https://zhuanlan.zhihu.com/p/166103184。
oh-my-posh
-
说实话
oh-my-zsh太丑了。我发现wsl也是可以安装oh-my-posh的。 -
先运行
sudo vim /etc/passwd编辑文件,将用户的shell修改回为bash -
安装
oh-my-posh(更新就重新下载,覆原文件夹)。1
2sudo wget https://github.com/JanDeDobbeleer/oh-my-posh/releases/latest/download/posh-linux-amd64 -O /usr/local/bin/oh-my-posh
sudo chmod +x /usr/local/bin/oh-my-posh -
下载主题:
1
2
3
4
5mkdir ~/.poshthemes
wget https://github.com/JanDeDobbeleer/oh-my-posh/releases/latest/download/themes.zip -O ~/.poshthemes/themes.zip
unzip ~/.poshthemes/themes.zip -d ~/.poshthemes
chmod u+rw ~/.poshthemes/*.omp.*
rm ~/.poshthemes/themes.zip -
可以在
bash的配置文件(~/.bashrc或~/.profile或~/.bash_profile)中配置一下,在最后一行加入喜欢的主题:1
eval "$(oh-my-posh --init --shell bash --config ~/.poshthemes/catppuccin_macchiato.omp.json)"
-
运行
bash生效(有的是运行. ~/.profile)。 -
其他详细内容参考官方文档。
window美化
鼠标样式
- 去github下载对应的鼠标样式。
- 解压,选择喜欢的鼠标样式,右键
.inf文件安装鼠标样式。
mybockfinder
- 去
steam安装mybockfinder,按照自己的喜好设置即可。 - 为了保证开机自启,相关设置选择
服务选项。
雨滴插件
Wallpaper Engine
- 去
steam安装壁纸引擎(Wallpaper Engine,收费),按照自己的喜好设置壁纸。 - 设置为开机自启。